CUDA Support for WSL 2

https://docs.nvidia.com/cuda/wsl-user-guide/index.html#cuda-support-for-wsl2


CUDA on WSL :: CUDA Toolkit Documentation

Whether to efficiently use hardware resources or to improve productivity, virtualization is a more widely used solution in both consumer and enterprise space. There are different types of virtualizations, and it is beyond the scope of this document to delv

docs.nvidia.com

The lastest NVIDIA Windows GPU Driver will fully support WSL 2.

With CUDA support in the driver, existing applications (compiled elsewhere on a Linux system for the same target GPU)

can run unmodified with the WSL environment.


To compile new CUDA applications, a CUDA Toolkit for Linux x86 is needed.

CUDA Toolkit support for WSL is still in preview stage as developer tools such as profilers are not available yet.

However, CUDA application development is fully supported in the WSL 2 environment, as a result, users should be able to compile new CUDA Linux applications with the lastest CUDA Toolkit for x86 Linux.


Once a Windows NVIDIA GPU driver is installed on the system, CUDA becomes available within WSL 2.

The CUDA driver installed on Windows host will be stubbed inside the WSL 2 as libcuda.so,

therefore users must not install any NVIDIA GPU Linux driver within WSL 2.

One has to be very careful here as the default CUDA Toolkit comes packaged with a driver,

and it is easy to overwrite the WSL 2 NVIDIA driver with the default installation.

We recommend developers to use a separate CUDA Toolkit for WSL 2 (Ubuntu) available here to avoid this overwriting.


https://docs.nvidia.com/cuda/archive/11.7.1/cuda-installation-guide-linux/index.html#wsl-installation


Installation Guide Linux :: CUDA Toolkit Documentation

Check that the device files/dev/nvidia* exist and have the correct (0666) file permissions. These files are used by the CUDA Driver to communicate with the kernel-mode portion of the NVIDIA Driver. Applications that use the NVIDIA driver, such as a CUDA ap

docs.nvidia.com


0. Remove CUDA files

$ sudo apt-get remove --purge '^nvidia-.*'
 
$ sudo apt-get remove --purge 'cuda*'
$ sudo apt-get autoremove --purge 'cuda*'
 
$ sudo rm -rf /usr/local/cuda
$ sudo rm -rf /usr/local/cuda-#.#


1. Prepare WSL

1.1. Remove Outdated Signing key:

$ sudo apt-key del 7fa2af80


2. Local Repo Installation for WSL

2.1. Install local repository on file system:

$ wget https://developer.download.nvidia.com/compute/cuda/repos/wsl-ubuntu/x86_64/cuda-wsl-ubuntu.pin
$ sudo mv cuda-wsl-ubuntu.pin /etc/apt/preferences.d/cuda-repository-pin-600

$ wget https://developer.download.nvidia.com/compute/cuda/11.7.1/local_installers/cuda-repo-wsl-ubuntu-11-7-local_11.7.1-1_amd64.deb
$ sudo dpkg -i cuda-repo-wsl-ubuntu-11-7-local_11.7.1-1_amd64.deb

2.2. Enroll ephemeral public GPG key:

$ sudo cp /var/cuda-repo-wsl-ubuntu-11-7-local/cuda-96193861-keyring.gpg /usr/share/keyrings/


3. Network Repo Installation for WSL

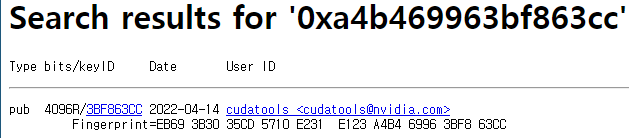
The new GPG public key for the CUDA repository (Debian-base distros) is 3bf863cc.

(https://developer.download.nvidia.com/compute/cuda/repos/ubuntu1604/x86_64/3bf863cc.pub)

This must be enrolled on the system, either using the cuda-keyring package or manually;

the apt-key command is deprecated and not recommended.

3.1. Install the newcuda-keyring package:

$ wget https://developer.download.nvidia.com/compute/cuda/repos/wsl-ubuntu/x86_64/cuda-keyring_1.0-1_all.deb
$ sudo dpkg -i cuda-keyring_1.0-1_all.deb


4. Common Installation Instructions for WSL

These instructions apply to both local and network installation for WSL.

4.1. Update the Apt repository cache:

$ sudo apt-get update

4.2. Install CUDA SDK:

$ sudo apt-get -y install cuda

$ sudo apt-get -y install cuda-toolkit-11-7

The installation instructions for the CUDA Toolkit can be found in the CUDA Toolkit download page for each installer.

But DO NOT choose the "cuda", "cuda-11-8", "cuda-drivers" meta-packages under WSL 2

as these packages will result in an attempt to install the Linux NVIDIA driver under WSL 2.

Install the cuda-toolkit-11-x metapackage only.


4.3. Perform the post-installation actions.

The post-installation actions must be manually performed.

These actions are split into mandatory, recommended, and optional sections.


5. Post-installation Actions

5.1. Mandatory Actions

Some actions must be taken after the installation before the CUDA Toolkit and Driver can be used.

5.1.1. Environment Setup

The PATH variable needs to include export PATH=/usr/local/cuda-11.7/bin${PATH:+:${PATH}}.

Nsight Compute has moved to /opt/nvidia/nsight-compute/ only in rpm/deb installation method.

When using .run installer it is still located under /usr/local/cuda-11.7/.


To add this path to the PATH variable:

$ export PATH=/usr/local/cuda-11.7/bin${PATH:+:${PATH}}

In addition, when using the runfile installation method,

the LD_LIBRARY_PATH variable needs to contain

  • /usr/local/cuda-11.7/lib64 on a 64-bit system, or
  • /usr/local/cuda-11.7/lib on a 32-bit system

To change the environment variables for 64-bit operating systems:

export LD_LIBRARY_PATH=/usr/local/cuda-11.7/lib64${LD_LIBRARY_PATH:+:${LD_LIBRARY_PATH}}

5.1.2 POWER9 Setup

Because of the addition of new features specific to the NVIDIA POWER9 CUDA driver,

there are some additional setup requirements in order for the driver to function properly.

These additional steps are not handled by the installation of CUDA packages,

and failure to ensure these extra requirements are met will result in a non-functional CUDA driver installation.


There are two changes that need to be made manually after installing the NVIDIA CUDA driver to ensure proper operation:

1. The NVIDIA Persistence Daemon should be automatically started for POWER9 installations.

    Check that it is running with the following command:

$ sudo systemctl status nvidia-persistenced


2. Disable a udev rule installed by default in some Linux distributions

that cause hot-pluggable memory to be automatically onlined when it is physically probed.

This behavior prevents NVIDIA software from bringing NVIDIA device memory online with non-default settings.

This udev rule must be disabled in order for the NVIDIA CUDA driver to function properly on POWER9 systems.


'OS > Linux' 카테고리의 다른 글

Linux Shell Script  (0) 2023.08.09
LD_LIBRARY_PATH  (0) 2022.12.21
Fastest way to check if a file exists  (0) 2022.11.10
Install libjpeg-turbo  (0) 2022.11.06
CUDA-11.4 on WSL2  (0) 2022.10.12

Reference:

https://www.it-note.kr/173


stat(2) - 파일의 상태 및 정보를 얻는 함수

stat(2) #include #include #include int stat(const char *path, struct stat *buf); 파일의 크기, 파일의 권한, 파일의 생성일시, 파일의 최종 변경일 등, 파일의 상태나 파일의 정보를 얻는 함수입니다. stat(2) 함수는 s

www.it-note.kr


#include <errno.h>
#include <sys/types.h>
#include <sys/stat.h>
#include <unistd.h>
#include <stdio.h>
#include <time.h>


#if 0
struct stat {
    __dev_t     st_dev;     /* Device. */
    __ino_t     st_ino;     /* File serial number */
    __nlink_t   st_nlink;   /* Link count. */
    __mode_t    st_mode;    /* File mode. */
    __uid_t     st_uid;     /* User ID of the file's owner. */
    __gid_t     st_gid;     /* Group ID of the file's group. */
    __dev_t     st_rdev;    /* Device number, if device. */
    __off_t     st_size;    /* Size of file, in bytes. */
    __blksize_t st_blksize; /* Optimal block size for I/O */
    __blkcnt_t  st_blocks;  /* Number 512-byte blocks allocated. */
    /**
     * Nanosecond resolution timestamps are stored in a format
     * equivalent to 'struct timespec'.
     * This is the type used whenever possible
     * but the Unix namespace rules do not allow the identifier 'timespec'
     * to appear in the <sys/stat.h> header.
     * Therefore we have to handle the use of this header
     * in strictly standard-compliant sources sepcial.
     */
    time_t      st_atime;   /* time of last access */
    time_t      st_mtile;   /* time of last modification */
    time_t      st_ctime;   /* time of last status change */
};

int stat(const char *path, struct stat *buf);
#endif


inline bool fs_file_exists(const char *path)
{
    struct stat buffer;
    return stat(path, &buffer) == 0;
}

int example(const char *path)
{
    struct stat sb;
    
    if (stat(path, &sb) == -1)
    {
        // 오류, 상세한 오류 내용은 errno 전역변수에 설정
        perror("stat");
        return errno;
    }
    
    switch (sb.st_mode & S_IFMT)
    {
    case S_IFBLK:  printf("block device\n");     break;
    case S_IFCHR:  printf("character device\n"); break;
    case S_IFDIR:  printf("directory\n");        break;
    case S_IFIFO:  printf("FIFO/pipe\n");        break;
    case S_IFLNK:  printf("symlink\n");          break;
    case S_IFREG:  printf("regular file\n");     break;
    case S_IFSOCK: printf("socket\n");           break;
    default:       printf("unknown?\n");         break;
    }
    
    printf("I-node number:            %ld\n", (long) sb.st_ino);
    printf("Mode:                     %lo (octal)\n", (unsigned long) sb.st_mode);
    printf("Link count:               %ld\n", (long) sb.st_nlink);
    printf("Ownership:                UID=%ld   GID=%ld\n", (long) sb.st_uid, (long) sb.st_gid);
    printf("Preferred I/O block size: %ld bytes\n",         (long) sb.st_blksize);
    printf("File size:                %lld bytes\n",        (long long) sb.st_size);
    printf("Blocks allocated:         %lld\n",              (long long) sb.st_blocks);
    printf("Last status change:       %s", ctime(&sb.st_ctime));
    printf("Last file access:         %s", ctime(&sb.st_atime));
    printf("Last file modification:   %s", ctime(&sb.st_mtime));
    
    return 0;
}


#include <iostream>
#include <string>
#include <sys/stat.h>   // stat
#include <errno.h>      // errno, ENOENT, EEXIST
#if defined(_WIN32)
#   include <direct.h>  // _mkdir
#endif


bool fs_file_exists(const std::string& path)
{
#if defined(_WIN32)
    struct _stat info;
    return !_stat(path.c_str(), &info);
#else
    struct stat info;
    return !stat(path.c_str(), &info);
#endif
}

bool fs_dir_exists(const std::string& path)
{
#if defined(_WIN32)
    struct _stat info;
    return _stat(path.c_str(), &info)
        ? false
        : (info.st_mode & _S_IFDIR) != 0;
#else
    struct stat info;
    return stat(path.c_str(), &info)
        ? false
        : (info.st_mode & S_IFDIR) != 0;
#endif
}

bool fs_mkdir(const std::string& path)
{
#if defined(_WIN32)
    int rv = _mkdir(path.c_str());
#else
    mode_t mode = 0755;
    int rv = mkdir(path.c_str(), mode);
#endif

    if (rv)
    {
        switch (errno)
        {
        case ENOENT:
            // parent didn't exist, try to create it
            {
                int pos = path.find_last_of('/');
                if (pos == std::string::npos)
#if defined(_WIN32)
                    pos = path.find_last_of('\\');
                if (pos == std::string::npos)
#endif
                    return false;
                
                if (!fs_mkdir(path.substr(0, pos)))
                    return false;
            }
            // now, try to create again
#if defined(_WIN32)
            return !_mkdir(path.c_str());
#else
            return !mkdir(path.c_str(), mode);
#endif
        case EEXIST:
            // done!
            return fs_dir_exists(path);

        default:
            return false;
        }
    }

    return true;
 }

'OS > Linux' 카테고리의 다른 글

LD_LIBRARY_PATH  (0) 2022.12.21
CUDA 11.7.1 on WSL2  (0) 2022.11.13
Install libjpeg-turbo  (0) 2022.11.06
CUDA-11.4 on WSL2  (0) 2022.10.12
Ubuntu에서 GPG ERROR NO_PUBKEY 해결방법  (0) 2022.10.11

Reference:

https://www.linuxfromscratch.org/blfs/view/svn/general/libjpeg.html


libjpeg-turbo-2.1.4

Installed Programs: cjpeg, djpeg, jpegtran, rdjpgcom, tjbench, and wrjpgcom Installed Libraries: libjpeg.so and libturbojpeg.so Installed Directories: /usr/share/doc/libjpeg-turbo-2.1.4

www.linuxfromscratch.org


$ sudo apt install cmake


Download

https://downloads.sourceforge.net/libjpeg-turbo/libjpeg-turbo-2.1.4.tar.gz


Download libjpeg-turbo from SourceForge.net


sourceforge.net

$ wget https://downloads.sourceforge.net/libjpeg-turbo/libjpeg-turbo-2.1.4.tar.gz
$ tar -xvf libjpeg-turbo-2.1.4.tar.gz
$ cd libjpeg-turbo-2.1.4/

$ mkdir build
$ cd build

$ cmake -DCMAKE_INSTALL_PREFIX=/usr \
        -DCMAKE_BUILD_TYPE=RELEASE  \
        -DENABLE_STATIC=FALSE       \
        -DCMAKE_INSTALL_DOCDIR=/usr/share/doc/libjpeg-turbo-2.1.4 \
        -DCMAKE_INSTALL_DEFAULT_LIBDIR=lib  \
        ..

$ make

$ sudo make install
...
Install the project...
-- Install configuration: "RELEASE"
-- Installing: /usr/lib/libturbojpeg.so.0.2.0
-- Installing: /usr/lib/libturbojpeg.so.0
-- Set runtime path of "/usr/lib/libturbojpeg.so.0.2.0" to "/usr/lib"
-- Installing: /usr/lib/libturbojpeg.so
-- Installing: /usr/bin/tjbench
-- Set runtime path of "/usr/bin/tjbench" to "/usr/lib"
-- Installing: /usr/include/turbojpeg.h
-- Installing: /usr/bin/rdjpgcom
-- Set runtime path of "/usr/bin/rdjpgcom" to "/usr/lib"
-- Installing: /usr/bin/wrjpgcom
-- Set runtime path of "/usr/bin/wrjpgcom" to "/usr/lib"
-- Installing: /usr/share/doc/libjpeg-turbo-2.1.4/README.ijg
-- Installing: /usr/share/doc/libjpeg-turbo-2.1.4/README.md
-- Installing: /usr/share/doc/libjpeg-turbo-2.1.4/example.txt
-- Installing: /usr/share/doc/libjpeg-turbo-2.1.4/tjexample.c
-- Installing: /usr/share/doc/libjpeg-turbo-2.1.4/libjpeg.txt
-- Installing: /usr/share/doc/libjpeg-turbo-2.1.4/structure.txt
-- Installing: /usr/share/doc/libjpeg-turbo-2.1.4/usage.txt
-- Installing: /usr/share/doc/libjpeg-turbo-2.1.4/wizard.txt
-- Installing: /usr/share/doc/libjpeg-turbo-2.1.4/LICENSE.md
-- Installing: /usr/share/man/man1/cjpeg.1
-- Installing: /usr/share/man/man1/djpeg.1
-- Installing: /usr/share/man/man1/jpegtran.1
-- Installing: /usr/share/man/man1/rdjpgcom.1
-- Installing: /usr/share/man/man1/wrjpgcom.1
-- Installing: /usr/lib/pkgconfig/libjpeg.pc
-- Installing: /usr/lib/pkgconfig/libturbojpeg.pc
-- Installing: /usr/lib/cmake/libjpeg-turbo/libjpeg-turboConfig.cmake
-- Installing: /usr/lib/cmake/libjpeg-turbo/libjpeg-turboConfigVersion.cmake
-- Installing: /usr/lib/cmake/libjpeg-turbo/libjpeg-turboTargets.cmake
-- Installing: /usr/lib/cmake/libjpeg-turbo/libjpeg-turboTargets-release.cmake
-- Installing: /usr/include/jconfig.h
-- Installing: /usr/include/jerror.h
-- Installing: /usr/include/jmorecfg.h
-- Installing: /usr/include/jpeglib.h
-- Installing: /usr/lib/libjpeg.so.62.3.0
-- Installing: /usr/lib/libjpeg.so.62
-- Set runtime path of "/usr/lib/libjpeg.so.62.3.0" to "/usr/lib"
-- Installing: /usr/lib/libjpeg.so
-- Installing: /usr/bin/cjpeg
-- Set runtime path of "/usr/bin/cjpeg" to "/usr/lib"
-- Installing: /usr/bin/djpeg
-- Set runtime path of "/usr/bin/djpeg" to "/usr/lib"
-- Installing: /usr/bin/jpegtran
-- Set runtime path of "/usr/bin/jpegtran" to "/usr/lib"


$ whereis *jpeg*
cjpeg: /usr/bin/cjpeg /usr/share/man/man1/cjpeg.1
djpeg: /usr/bin/djpeg /usr/share/man/man1/djpeg.1
jpegtran: /usr/bin/jpegtran /usr/share/man/man1/jpegtran.1
libjpeg: /usr/lib/libjpeg.so
libjpeg.so: /usr/lib/x86_64-linux-gnu/libjpeg.so.8 /usr/lib/libjpeg.so.62 /usr/lib/libjpeg.so
libjpeg.so.62.3: /usr/lib/libjpeg.so.62.3.0
libturbojpeg: /usr/lib/libturbojpeg.so
libturbojpeg.so: /usr/lib/libturbojpeg.so /usr/lib/libturbojpeg.so.0
libturbojpeg.so.0.2: /usr/lib/libturbojpeg.so.0.2.0

'OS > Linux' 카테고리의 다른 글

CUDA 11.7.1 on WSL2  (0) 2022.11.13
Fastest way to check if a file exists  (0) 2022.11.10
CUDA-11.4 on WSL2  (0) 2022.10.12
Ubuntu에서 GPG ERROR NO_PUBKEY 해결방법  (0) 2022.10.11
CMake Install  (0) 2022.10.01

0. Remove CUDA files

$ sudo apt-get remove --purge '^nvidia-.*'

$ sudo apt-get remove --purge 'cuda*'
$ sudo apt-get autoremove --purge 'cuda*'

$ sudo rm -rf /usr/local/cuda
$ sudo rm -rf /usr/local/cuda-#.#


1. Setting CUDA Toolkit on WSL2

$ wget https://developer.download.nvidia.com/compute/cuda/repos/wsl-ubuntu/x86_64/cuda-wsl-ubuntu.pin
$ sudo mv cuda-wsl-ubuntu.pin /etc/apt/preferences.d/cuda-repository-pin-600

$ wget https://developer.download.nvidia.com/compute/cuda/11.4.0/local_installers/cuda-repo-wsl-ubuntu-11-4-local_11.4.0-1_amd64.deb
$ sudo dpkg -i cuda-repo-wsl-ubuntu-11-4-local_11.4.0-1_amd64.deb
$ sudo apt-key add /var/cuda-repo-wsl-ubuntu-11-4-local/7fa2af80.pub

$ sudo apt-get update
$ sudo apt-get -y install cuda

설치 확인

$ cd /usr/local/cuda-11.4/samples/4_Finance/BlackScholes
$ sudo make BlackScholes
$ ./BlackScholes
[./BlackScholes] - Starting...
GPU Device 0: "Pascal" with compute capability 6.1

Initializing data...
...allocating CPU memory for options.
...allocating GPU memory for options.
...generating input data in CPU mem.
...copying input data to GPU mem.
Data init done.

Executing Black-Scholes GPU kernel (512 iterations)...
Options count             : 8000000
BlackScholesGPU() time    : 0.227898 msec
Effective memory bandwidth: 351.033566 GB/s
Gigaoptions per second    : 35.103357

BlackScholes, Throughput = 35.1034 GOptions/s, Time = 0.00023 s, Size = 8000000 options, NumDevsUsed = 1, Workgroup = 128

Reading back GPU results...
Checking the results...
...running CPU calculations.

Comparing the results...
L1 norm: 1.741792E-07
Max absolute error: 1.192093E-05

Shutting down...
...releasing GPU memory.
...releasing CPU memory.
Shutdown done.

[BlackScholes] - Test Summary

NOTE: The CUDA Samples are not meant for performance measurements. Results may vary when GPU Boost is enabled.

Test passed

Chane Repository

$ sudo nano /etc/apt/sources.list

Replace: Ctrl + \

Search (to replace): archive.ubuntu.com

Replace with: mirror.kakao.com

Save: Ctrl + s

Exit: Ctrl + x

확인

$ sudo apt update


개발환경 설정

1. PIP install

$ sudo apt-get install python3-pip
$ pip install --upgrade pip


2. Pytorch, Torchvision install

$ pip3 install torch torchvision torchaudio


3. OpenCV

$ pip install opencv-python


4. TensorRT

 - CUDA toolkit, PyCUDA

$ pip install numpy cupy

Kepler architecture 이상의 GPU 필요


- TensorRT C++

https://developer.nvidia.com/tensorrt


NVIDIA TensorRT

An SDK with an optimizer for high-performance deep learning inference.

developer.nvidia.com

$ wget https://developer.nvidia.com/compute/machine-learning/tensorrt/secure/8.4.3/local_repos/nv-tensorrt-repo-ubuntu1804-cuda11.6-trt8.4.3.1-ga-20220813_1-1_amd64.deb
$ sudo dpkg -i nv-tensorrt-repo-ubuntu1804-cuda11.6-trt8.4.3.1-ga-20220813_1-1_amd64.deb
(Reading database ... 71998 files and directories currently installed.)
Preparing to unpack nv-tensorrt-repo-ubuntu1804-cuda11.6-trt8.4.3.1-ga-20220813_1-1_amd64.deb ...
Unpacking nv-tensorrt-repo-ubuntu1804-cuda11.6-trt8.4.3.1-ga-20220813 (1-1) over (1-1) ...
Setting up nv-tensorrt-repo-ubuntu1804-cuda11.6-trt8.4.3.1-ga-20220813 (1-1) ...

위와 같이 설치하면 header 파일 및 lib 파일을 찾을 수 없음.

아래 링크의 TAR Package를 받아야 함

https://developer.nvidia.com/compute/machine-learning/tensorrt/secure/8.4.3/tars/tensorrt-8.4.3.1.linux.x86_64-gnu.cuda-11.6.cudnn8.4.tar.gz

$ tar -xvf TensorRT-8.4.3.1.Linux.x86_64-gnu.cuda-11.6.cudnn8.4.tar.gz
$ mv TensorRT-8.4.3.1 ~/dev/

include, lib 경로를 환경변수에 등록

$ sudo nano ~/.bashrc

...

export PATH=/usr/local/cuda/bin:$PATH
export LD_LIBRARY_PATH=/usr/local/cuda/lib64:/lib64:$LD_LIBRARY_PATH:~/dev/TensorRT-8.4.3.1/lib

bashrc 변경 적용 또는 재시작

$ source ~/.bashrc

TensorRT-8.4.3.1/python/ 폴더에서 현재 파이썬 버전에 맞는 패키지 설치

$ pip install tensorrt-8.4.3.1-cp36-none-linux_x86_64.whl
Defaulting to user installation because normal site-packages is not writeable
Processing ./tensorrt-8.4.3.1-cp36-none-linux_x86_64.whl
Installing collected packages: tensorrt
Successfully installed tensorrt-8.4.3.1

TensorRT-8.4.3.1/uff/ 폴더에서도 설치

$ cd ../uff/
$ pip install uff-0.6.9-py2.py3-none-any.whl
Defaulting to user installation because normal site-packages is not writeable
Processing ./uff-0.6.9-py2.py3-none-any.whl
Requirement already satisfied: protobuf>=3.3.0 in /home/ym/.local/lib/python3.6/site-packages (from uff==0.6.9) (3.17.3)
Requirement already satisfied: numpy>=1.11.0 in /home/ym/.local/lib/python3.6/site-packages (from uff==0.6.9) (1.19.5)
Requirement already satisfied: six>=1.9 in /home/ym/.local/lib/python3.6/site-packages (from protobuf>=3.3.0->uff==0.6.9) (1.15.0)
Installing collected packages: uff
Successfully installed uff-0.6.9

$ cd ../graphsurgeon/
$ pip install graphsurgeon-0.4.6-py2.py3-none-any.whl
Defaulting to user installation because normal site-packages is not writeable
Processing ./graphsurgeon-0.4.6-py2.py3-none-any.whl
Installing collected packages: graphsurgeon
Successfully installed graphsurgeon-0.4.6

$ cd ../onnx_graphsurgeon/
$ pip install onnx_graphsurgeon-0.3.12-py2.py3-none-any.whl
Defaulting to user installation because normal site-packages is not writeable
Processing ./onnx_graphsurgeon-0.3.12-py2.py3-none-any.whl
Collecting onnx
  Using cached onnx-1.12.0.tar.gz (10.1 MB)
  Preparing metadata (setup.py) ... done
Requirement already satisfied: numpy in /home/ym/.local/lib/python3.6/site-packages (from onnx-graphsurgeon==0.3.12) (1.19.5)
Requirement already satisfied: protobuf<=3.20.1,>=3.12.2 in /home/ym/.local/lib/python3.6/site-packages (from onnx->onnx-graphsurgeon==0.3.12) (3.17.3)
Requirement already satisfied: typing-extensions>=3.6.2.1 in /home/ym/.local/lib/python3.6/site-packages (from onnx->onnx-graphsurgeon==0.3.12) (3.7.4.3)
Requirement already satisfied: six>=1.9 in /home/ym/.local/lib/python3.6/site-packages (from protobuf<=3.20.1,>=3.12.2->onnx->onnx-graphsurgeon==0.3.12) (1.15.0)
Building wheels for collected packages: onnx
  Building wheel for onnx (setup.py) ... error

마지막 오류 해결해야 함...

- Protobuf 설치

$ pip3 install "protobuf>=3.11.0,<=3.20.1"

여전히 오류가 나지만... python에서 import tensorrt 문제 없음

$ sudo apt-get update
...
W: GPG error: http://developer.download.nvidia.com/compute/cuda/repos/ubuntu1804/x86_64  InRelease: The following signatures couldn't be verified because the public key is not available: NO_PUBKEY A4B469963BF863CC
E: The repository 'http://developer.download.nvidia.com/compute/cuda/repos/ubuntu1804/x86_64  InRelease' is not signed.
N: Updating from such a repository can't be done securely, and is therefore disabled by default.
N: See apt-secure(8) manpage for repository creation and user configuration details.

아래 사이트로 접속해 NO_PUBKEY 뒷 부분의 코드 앞에 '0x'를 붙여서 검색

MIT GPG KeyServer: http://pgp.mit.edu/ 


MIT PGP Key Server


pgp.mit.edu

pub 오른쪽 key ID 항목(3BF863CC) 복사해서 키 등록

$ sudo apt-key adv --keyserver keyserver.ubuntu.com --recv 3BF863CC
Executing: /tmp/apt-key-gpghome.8Pt4MWCK04/gpg.1.sh --keyserver keyserver.ubuntu.com --recv 3BF863CC
gpg: key A4B469963BF863CC: public key "cudatools <cudatools@nvidia.com>" imported
gpg: Total number processed: 1
gpg:               imported: 1

업데이트 확인

$ sudo apt-get update
Get:1 http://developer.download.nvidia.com/compute/cuda/repos/ubuntu1804/x86_64  InRelease [1581 B]
Hit:2 https://developer.download.nvidia.com/compute/cuda/repos/wsl-ubuntu/x86_64  InRelease
Ign:3 http://developer.download.nvidia.com/compute/machine-learning/repos/ubuntu1804/x86_64  InRelease
Get:4 http://developer.download.nvidia.com/compute/cuda/repos/ubuntu1804/x86_64  Packages [950 kB]
Hit:5 http://security.ubuntu.com/ubuntu bionic-security InRelease
Hit:6 http://developer.download.nvidia.com/compute/machine-learning/repos/ubuntu1804/x86_64  Release
Hit:8 http://archive.ubuntu.com/ubuntu bionic InRelease
Hit:9 http://archive.ubuntu.com/ubuntu bionic-updates InRelease
Hit:10 http://archive.ubuntu.com/ubuntu bionic-backports InRelease
Fetched 950 kB in 2s (582 kB/s)
Reading package lists... Done​

'OS > Linux' 카테고리의 다른 글

Install libjpeg-turbo  (0) 2022.11.06
CUDA-11.4 on WSL2  (0) 2022.10.12
CMake Install  (0) 2022.10.01
VSCode: ssh로 접근해서 편집된 파일 저장 시 permission 문제  (0) 2022.08.22
glib/streamer install  (0) 2021.11.15

+ Recent posts